
Many users want a clear, simple way to run John White’s peptide presets in a scalar field. This guide walks you through the exact setup steps—from downloading the latest software to starting your session between the Transmitter and Receiver.
Background: Peptide Presets and John’s Work
Peptide presets are the result of years of research and development by John White. These presets are designed to represent peptide information in a frequency-based form, allowing the body to interact with that information in a non-invasive, informational way.
Many users have found that running peptide presets within a scalar field provides a smoother and more supportive experience. This is why Spooky2 Scalar is often chosen when working with peptide presets—it creates a stable, coherent scalar environment that supports clearer interaction and integration.
Below is a step-by-step guide on how to run peptide presets using Spooky2 Scalar.
Step-by-Step Guide
First, make sure you are using the latest version of the Spooky2 software, which includes updates with 1,000+ peptide presets.
https://www.spooky2.com/downloadspage/Set up your Spooky2 Scalar Transmitter and Receiver according to standard instructions, then tune your system before starting a session. A stable, well-tuned scalar field supports consistent results.
Connect your GeneratorX Pro to the Spooky2 Scalar device as required. Ensure all cables are properly connected and that the generator is recognized by the software.
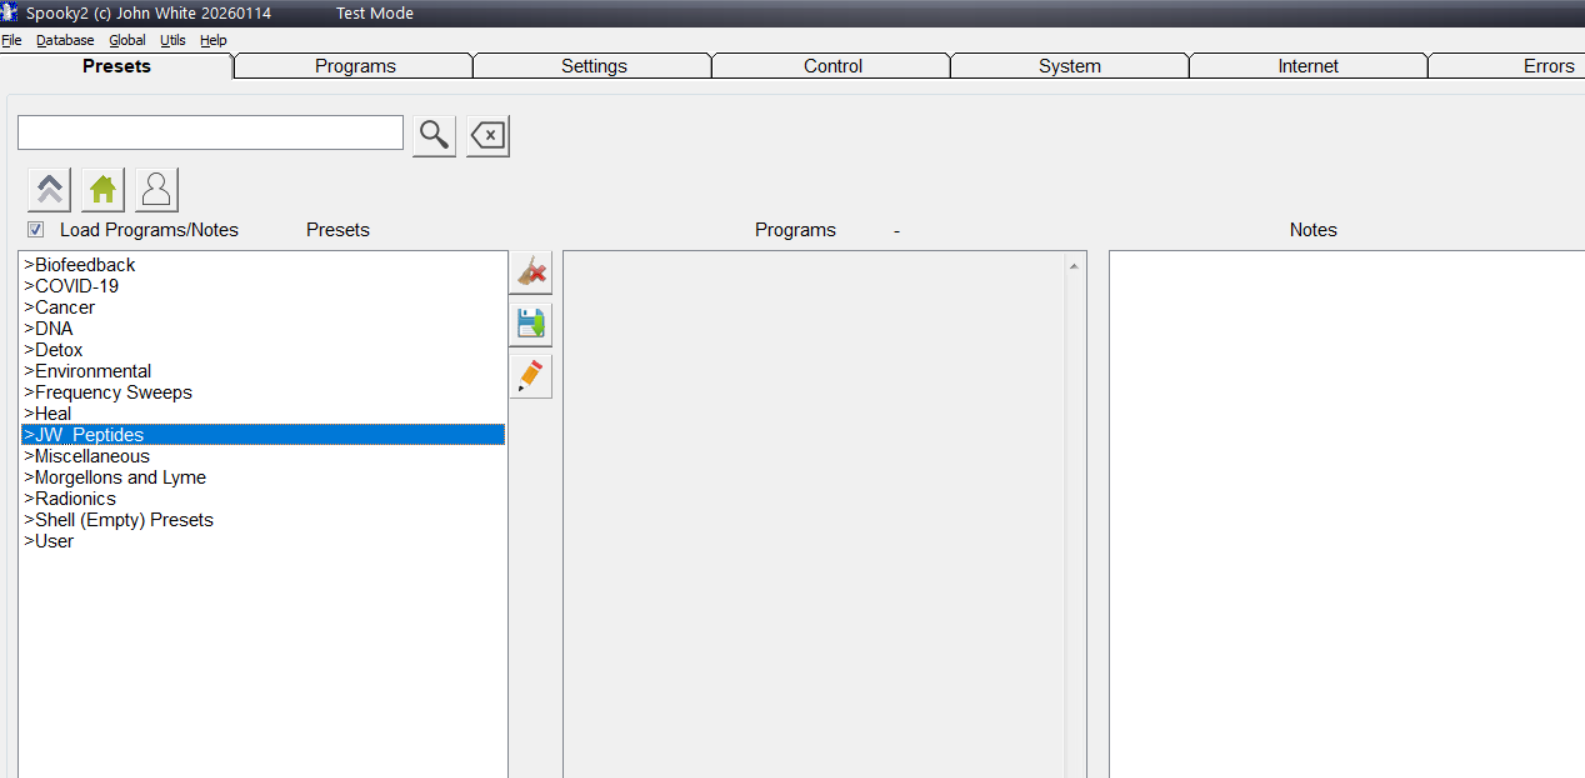
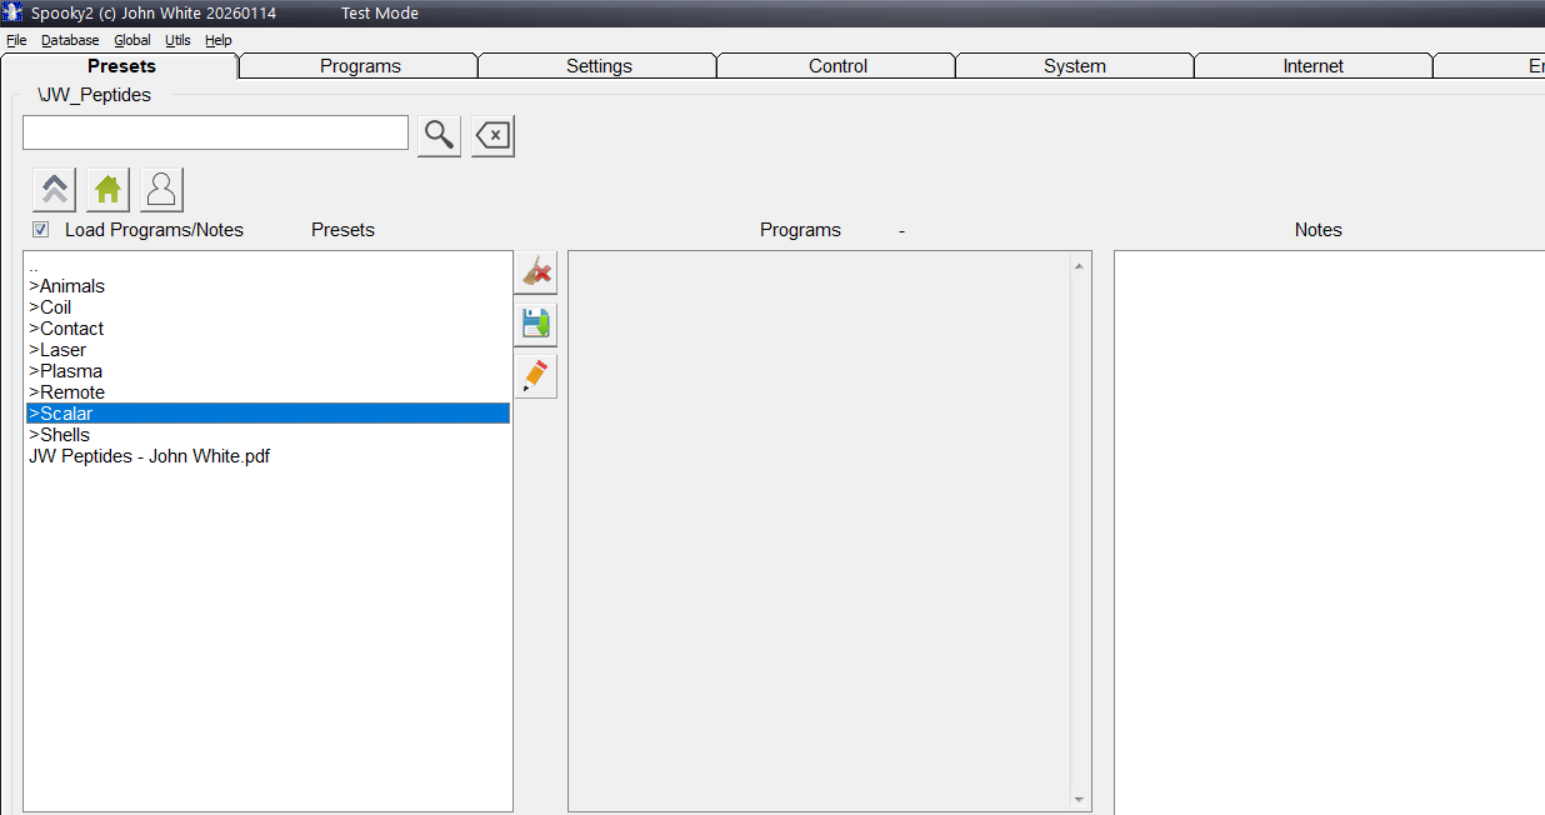
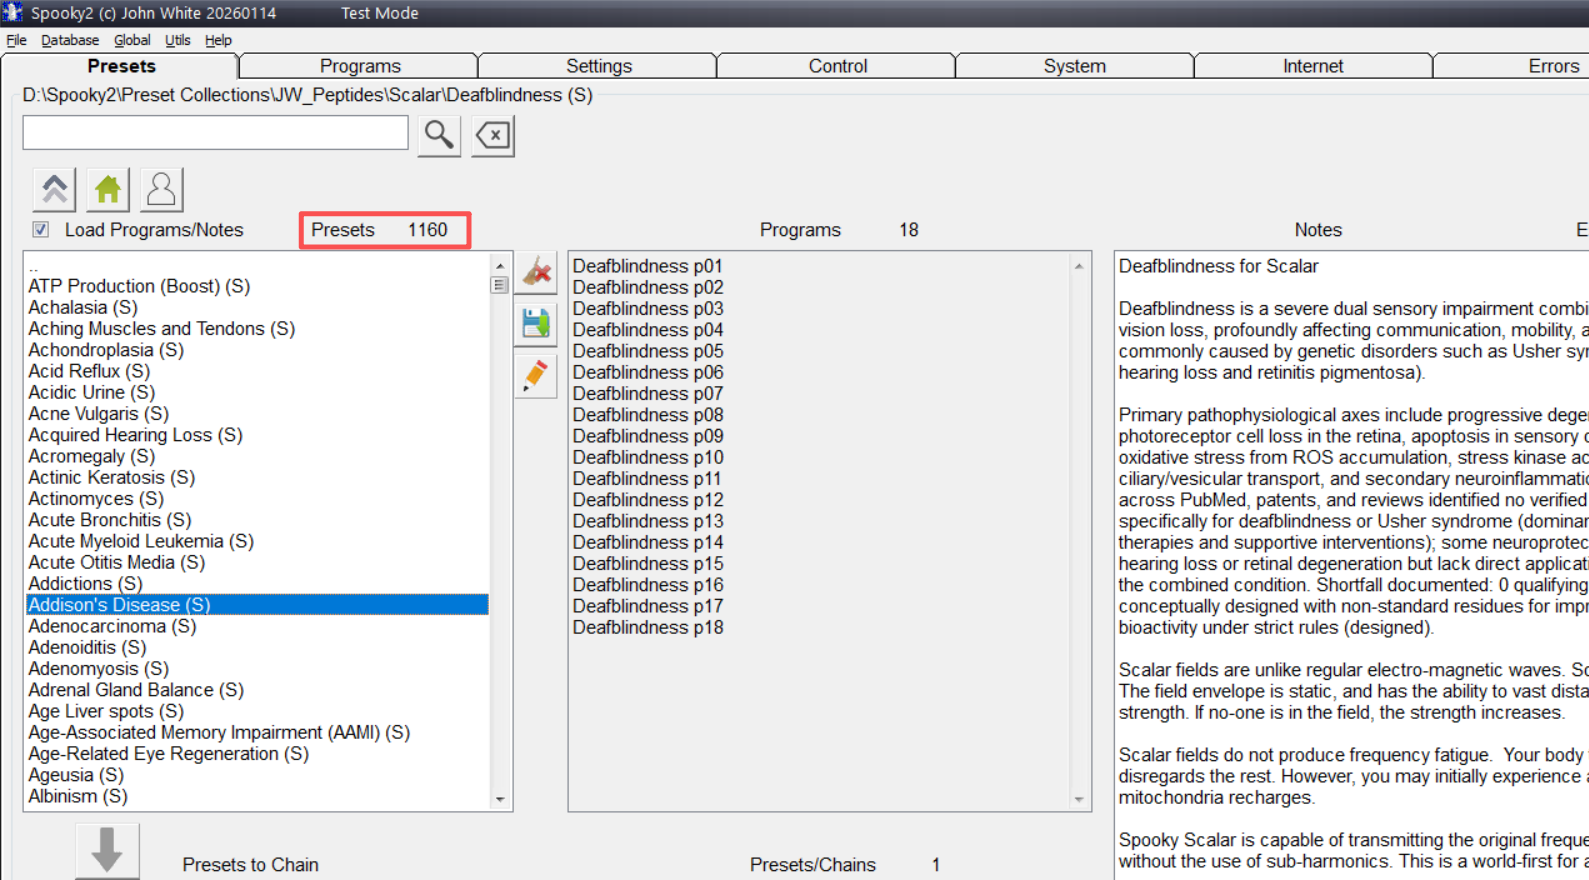
Open the Spooky2 software, go to the Presets tab, navigate to JW_Peptides, and select Scalar mode. You will now see a list of peptide presets.
Choose the peptide preset that best matches your symptoms or wellness goals. After selecting the appropriate preset, double-click it to load.
Navigate to the CONTROL tab, click Overwrite Generator, select the correct generator port, then click Start to begin running the program(s).
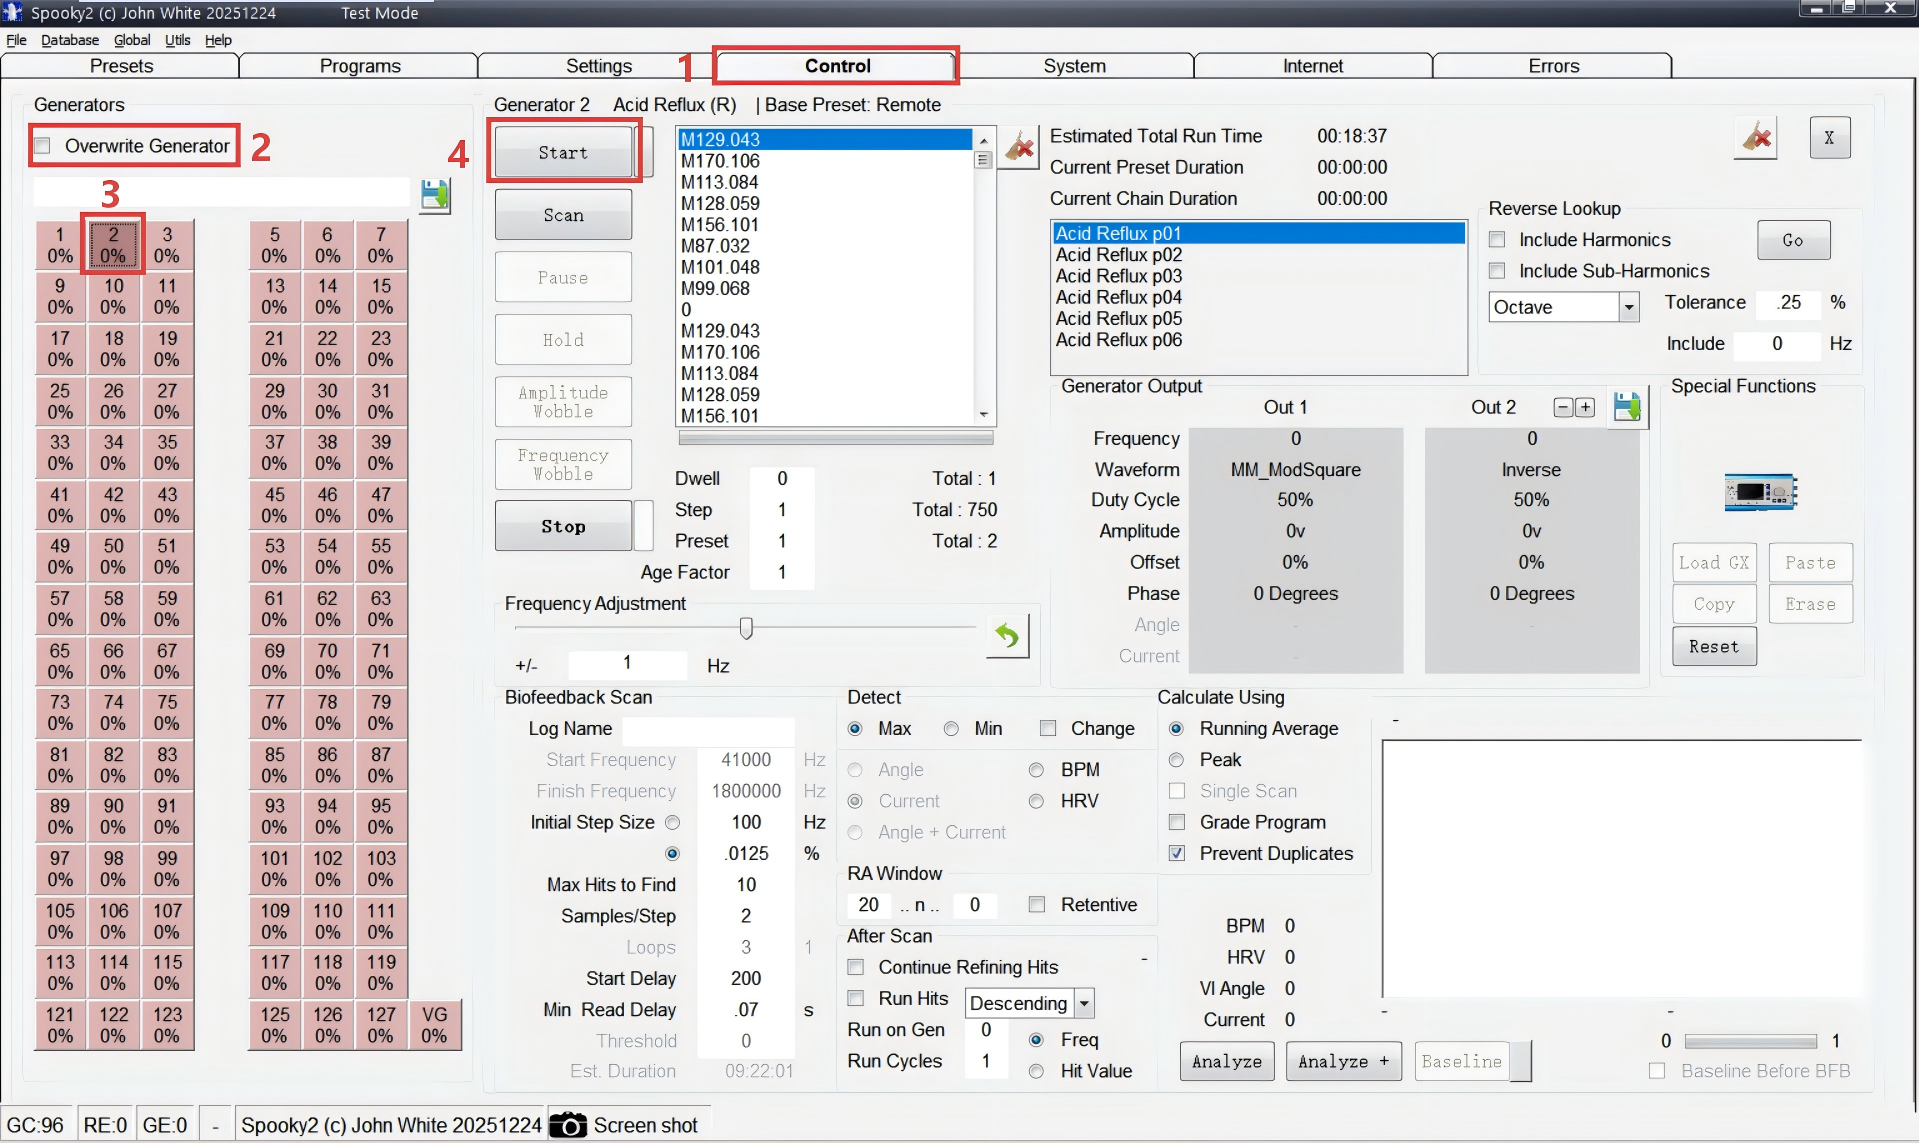
Note: This screenshot is from test mode, so multiple signal sources are shown. Once the device is properly connected, only the available signal sources will be displayed.
Sit or lie comfortably between the Transmitter and Receiver to allow scalar energy to interact naturally with your body while the peptide preset is running.
Q&A
Final Notes
When starting out, it’s often best to begin with fewer presets and allow time between sessions. Peptide presets work through communication and gradual integration—so consistency and observation matter.
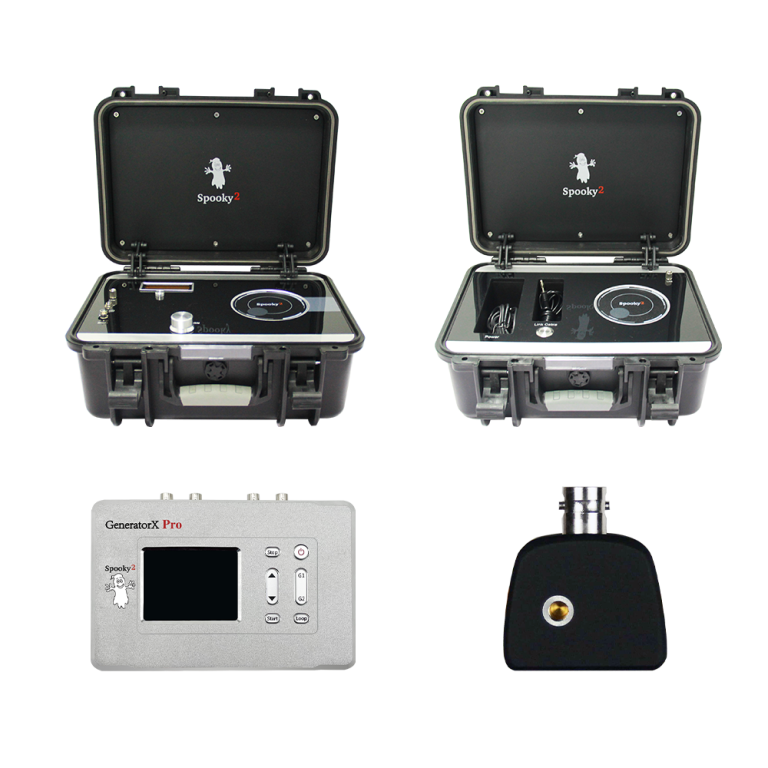
Spooky2 Scalar GX Pro Essential Kit
If you’re ready to run peptide presets in a stable scalar field with a complete, streamlined setup, the Spooky2 Scalar GX Pro Essential Kit is a strong starting point for building a consistent routine at home.

Can this be done only using the XM generator?
Can this be done remotely or do you need to sit in the field?
this can be done remotely. Just click the JW peptides, remote, then select your generator making sure your DNA is in the remote.